sing-box 安装教程

sing-box 安装教程
Tom本文介绍 sing-box 作为透明网关的安装方法
[TOC]
一、脚本部署 sing-box
脚本在 GitHub,虚拟机需具备科学上网能力
步骤 1: 新建 Debian 或 Ubuntu 虚拟机,运行安装脚本
1 | wget https://raw.githubusercontent.com/herozmy/StoreHouse/refs/heads/latest/install.sh && bash install.sh |
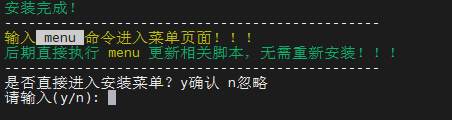
步骤 2: 输入 y 确认
步骤 3: 输入 3 安装 sing-box
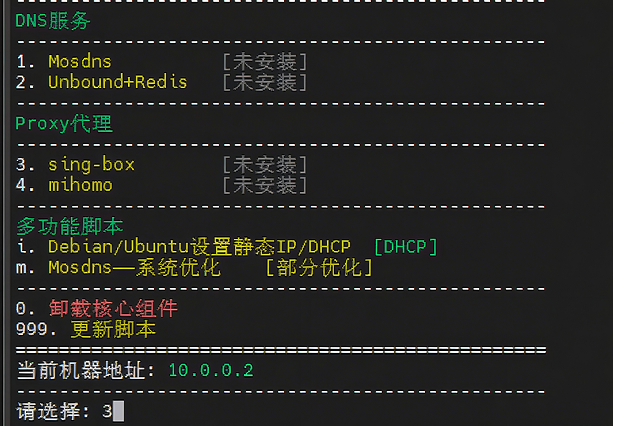
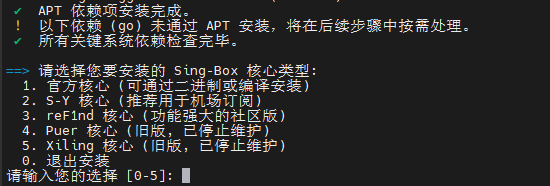
步骤 4: 选择核心版本
- VPS 用户:选择
1.官方核心 - 机场用户:选择
3.reF1nd 核心
步骤 5: 输入 y 确认,粘贴订阅链接

步骤 6: 回车确认
步骤 7: 安装成功后,输入 proxytool 管理服务

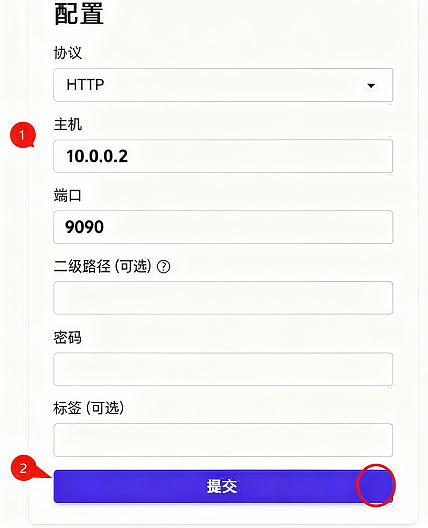
步骤 8: 打开 UI 面板

访问提示的地址,输入 sing-box 所在 VM 的 IP:9090 即可打开 UI 面板。
脚本也可安装 mihomo 裸核,自行探索。
二、手动部署 sing-box 官方核心
使用 sing-box 裸核需要 4 个步骤:
- 准备 sing-box 二进制程序
- 准备配置文件
- 创建 systemd 服务文件
- 安装并配置 nftables
建议使用 Debian 或 Ubuntu 虚拟机,本文以 Debian 13 为例(1 核/1G 内存/8G 硬盘)
配置文件、systemd 服务文件、nftables 配置文件来自 @Ron 大佬
(1)安装 sing-box 程序
步骤 1: 更新系统
1 | apt update |
步骤 2: 修改时区
1 | dpkg-reconfigure tzdata |
步骤 3: 安装 sing-box(3 种方式,新手建议选 1 或 2)
方式 1: 下载预编译版本(虚拟机需科学,x86 架构,默认 1.12.12)
1 | wget https://github.com/SagerNet/sing-box/releases/download/v1.12.12/sing-box-1.12.12-linux-amd64.tar.gz && \ |
方式 2: 手动下载
- 访问 sing-box releases
- 下载对应架构的版本
- 解压后将
sing-box上传到/usr/local/bin/ - 赋予执行权限:
1 | chmod +x /usr/local/bin/sing-box |
方式 3: 编译安装最新版
1 | apt -y install curl git build-essential libssl-dev libevent-dev zlib1g-dev gcc-mingw-w64 |
如需特定版本,将 latest 改为版本号(如 v1.12.0):
1 | go install -v -tags with_quic,with_grpc,with_dhcp,with_wireguard,with_utls,with_clash_api,with_gvisor,with_v2ray_api,with_lwip,with_acme github.com/sagernet/sing-box/cmd/sing-box@v1.12.0 |
(2)准备配置文件
步骤 1: 创建配置目录
1 | mkdir -p /usr/local/etc/sing-box/conf |
步骤 2: 下载配置模板
访问 GitHub 仓库 下载 6 个文件到 /usr/local/etc/sing-box/conf/
或使用命令下载:
1 | cd /usr/local/etc/sing-box/conf |
步骤 3: 下载 ruleset 文件
1 | cd /usr/local/etc/sing-box |
步骤 4: 修改配置文件
仅需修改 /usr/local/etc/sing-box/conf/04_outbound.json,添加节点信息。
注意:
- Proxy 分组名称不要修改
- 确保节点正常,否则无法下载 UI
- 修改
GLOBAL策略组顺序可调整 UI 显示顺序
步骤 5: 测试配置
1 | /usr/local/bin/sing-box run -C /usr/local/etc/sing-box/conf/ |
无报错则按 Ctrl+C 取消,继续下一步。
(3)创建 sing-box 启动服务
1 | cd /etc/systemd/system/ |
检查运行状态:
1 | systemctl status sing-box |
显示绿色 active (running) 表示正常运行。
(4)安装并配置 nftables
步骤 1: 安装 nftables
1 | apt install nftables -y |
步骤 2: 下载配置文件
1 | cd /etc |
步骤 3: 修改配置
编辑 /etc/nftables.conf:
- 将
10.0.0.0/8替换为自己的内网 IP 段 - 如 fakeip 段不是
28.0.0.0/8和f2b0::/18,自行搜索替换
步骤 4: 启用 nftables
1 | nft flush ruleset |
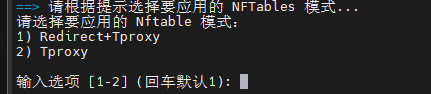
默认 TCP 使用 redirect,UDP 使用 tproxy。
切换脚本: @Ron 大佬写的 nftables 规则切换脚本
- 选项 1:tcp-redirect、udp-tproxy
- 选项 2:tcp/udp 都用 tproxy
使用前需修改脚本中的内网 IP 段和 fakeIP 段。
至此,sing-box 安装完毕。